
UniBeast: Install OS X Yosemite on Any Supported Intel-based PC

  1. tonymacx86's Avatar
    Administrator
      

    Join Date
    Nov 2009
    Posts
    6,843
    Mobo
    GA-Z87X-UD7-TH
    CPU
    i7-4770K
    Graphics
    GTX 770
    Online
    tonymacx86 is offline

    iPhone MacBook Pro Mac Mini Apple PowerBook
    175 #1

    The following guide is a complete walkthrough for installing a fresh version of OS X Yosemite. It requires no experience and all of the necessary installation and post-installation tools are available on tonymacx86.com.


    UniBeast is a tool that creates a bootable installer out of your downloaded version of OS X. In order to start fresh, you'll need access to a functional computer running Mac OS X Snow Leopard 10.6.8 or later. This is a requirement, as you need access to the Mac App Store to download OS X and create the installation drive. To start from scratch, booting the 10.6 Snow Leopard Retail DVD directly, check out iBoot + MultiBeast.

    Table of Contents


    Before You Begin

    1. Register here at tonymacx86! If you don't have a user account, create one!
    2. Get our latest MultiBeast and UniBeast tools from the downloads section.
    3. Purchase a 8GB or larger USB drive.
    4. Do a full backup of your system

    The following guide is meant as a fresh installation method. To perform an update from OS X Mavericks to OS X Yosemite, saving system settings, data, and apps follow this guide.


    STEP 1: Download OS X Yosemite
    The full operating system is a free download for anyone who has purchased Mac OS X Snow Leopard, Lion, or Mountain Lion, or a Mac preloaded with Mavericks. Download the Application from the Mac App Store using your Apple ID on any Mac or functional computer running Mac OS X 10.6.8 or later.

    1. Open Mac App Store
    2. Log in with your Apple ID
    3. Download OS X Yosemite

    The Application Install OS X Yosemite will appear in /Applications.


    STEP 2: Create a Bootable USB Drive with UniBeast

    Take a deep breath and take your time- this is pretty simple, but it's easy to miss things if you rush. Follow each step to the letter.

    1. Insert the USB drive
    2. Open /Applications/Utilities/Disk Utility
    3. Highlight the USB drive in left column


    4. Click on the Partition tab
    5. Click Current and choose 1 Partition
    6. Click Options...
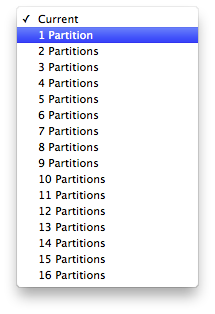
    7. Choose Master Boot Record
    8. Under Name: type USB (You can rename it later)
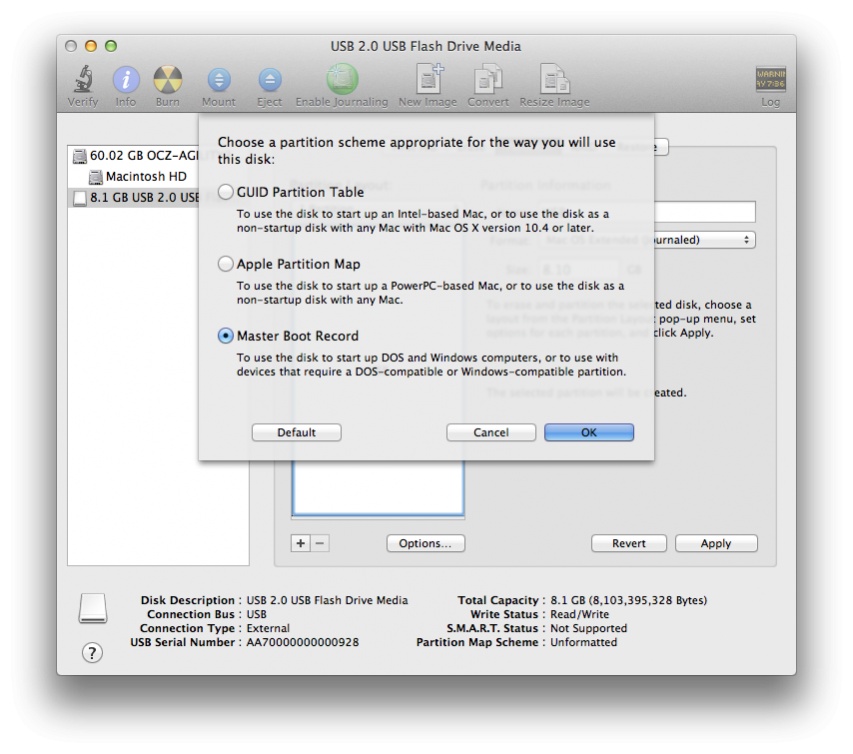
    9. Under Format: choose Mac OS Extended (Journaled)
    10. Click Apply then Partition
    11. Download and run UniBeast
    12. Click ContinueContinueContinueAgree
    13. At Destination Select, choose USB and click Continue
    14. Choose Yosemite on the Select OS Installation screen
    15. Click Continue
    16. If using a 5 or 6 Series system with AWARD BIOS choose Legacy USB Support
    17. If using a laptop, choose Laptop Support
    18. Click Continue
    19. Enter password and click Install
    UniBeast will now create the bootable USB drive. The process will only take about 10-15 minutes, depending on system and drive speed. Do not unplug or stop during this time.

    20. Drag MultiBeast to your completed USB drive.


    STEP 3: Recommended BIOS Settings

    If you're installing on a recommended CustoMac desktop with AMI UEFI BIOS, the options are simple. For other systems make sure to set your BIOS to Optimized Defaults, and your hard drive to AHCI mode. Here are standard AMI UEFI BIOS settings for Gigabyte AMI UEFI BIOS,Gigabyte AWARD BIOSASUS AMI UEFI BIOS, and MSI AMI UEFI BIOS.

    1. To access BIOS/UEFI Setup, press and hold Delete on a USB Keyboard while the system is booting up
    2. Load Optimized Defaults
    3. If your CPU supports VT-d, disable it
    4. If your system has CFG-Lock, disable it
    5. If your system has Secure Boot Mode, disable it
    6. Set OS Type to Other OS
    7. Save and exit.


    STEP 4: Install OS X Yosemite

    You're almost done! All you need to do is boot from the USB drive and install!

    1. Turn on the computer
    2. Press the hotkey to choose boot device (usually F12 or F8)
    3. Choose USB-HDD
    4. At the Chimera Boot Screen, choose USB and hitEnter


    If you have trouble reaching the installer, type -x at the Boot screen as shown below. You can type the boot flags GraphicsEnabler=YesPCIRootUID=1maxmem=4096maxmem=8192, andnpci=0x2000 by themselves or together in order to solve boot issues for older graphics cards and machines. Type -v to bypass the Apple boot screen and enter verbose startup mode. X58 and X79 systems always need npci=0x2000. For further explanations of boot flags, check out the post here. Also, if you need help with what to use for your graphics card, see the post here.


    5. When you arrive at the Installer, choose language.

    6. For a new installation of OS X, you MUST erase and format the destination drive according to the following steps before continuing.
    a. In the top menu bar choose Utilities, and open Disk Utility
    b. Highlight your target hard drive for the Yosemite installation in left column.
    c. Click Partition tab
    d. Click Current and choose 1 Partition
    e. Click Options...
    f. Choose GUID Partition Method
    g. Under Name: type Yosemite (You can rename it later)
    h. Under Format: choose Mac OS Extended (Journaled)
    i. Click Apply then Partition
    j. Close Disk Utility

    7. When the installer asks you where to install, choose Yosemite, or your existing install.
    8. Upon completion, restart the system.


    STEP 5: Post-Installation Using MultiBeast

    MultiBeast is an all-in-one post-installation tool designed to enable boot from hard drive, and install support for Audio, Network, and Graphics. In addition it includes System Utilities to repair permissions and a collection of drivers and config files. The installation is complete, but the drive isn't bootable yet. Boot from the USB again, this time choosing Yosemite.

    1. Turn on the computer
    2. Press the hotkey to choose boot device
    3. Choose USB-HDD
    4. At the Chimera Boot Screen, choose your new Yosemite installation.
    5. Complete OS X Yosemite setup

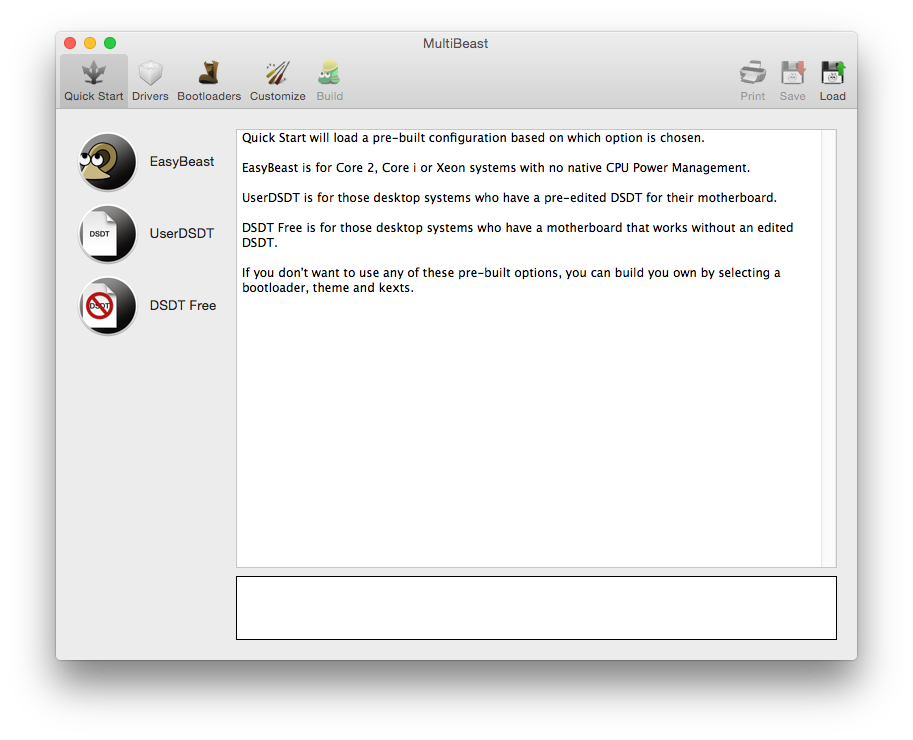
    6. Open and run Multibeast

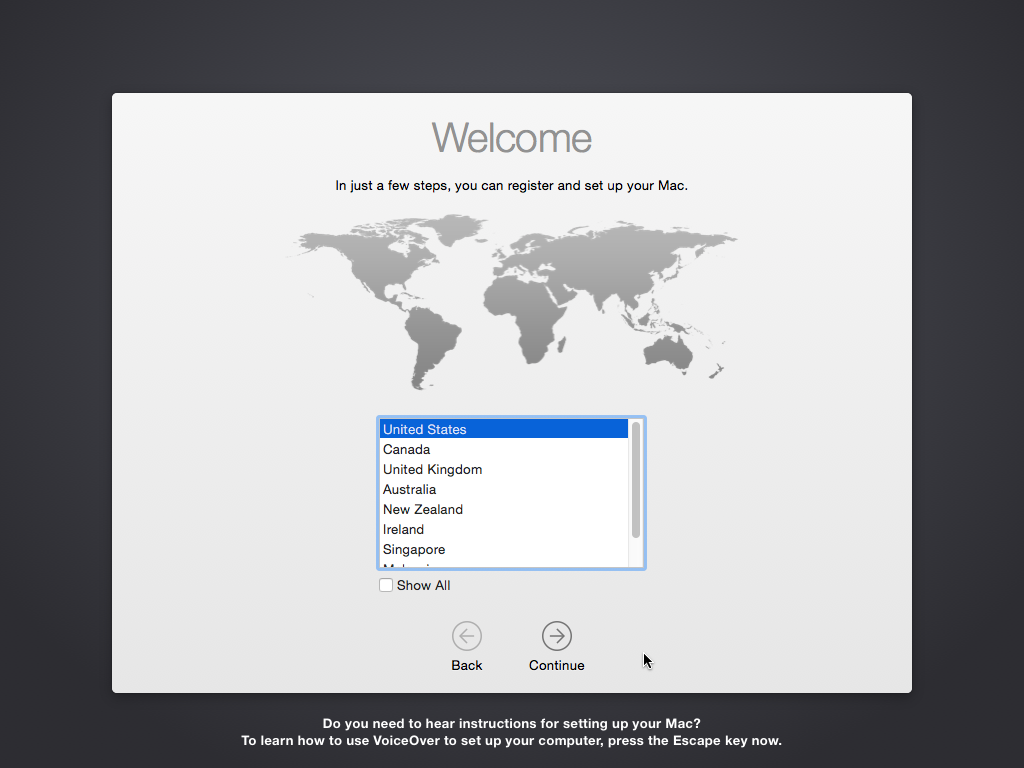
    7. If this is a fresh installation, click Quick Start to choose EasyBeastUserDSDT, or DSDT-Free.For 7/8/9 series recommended builds choose DSDT-Free.

    8. Click Drivers for Audio, Graphics, and Network options

    9. Click Customize for further options

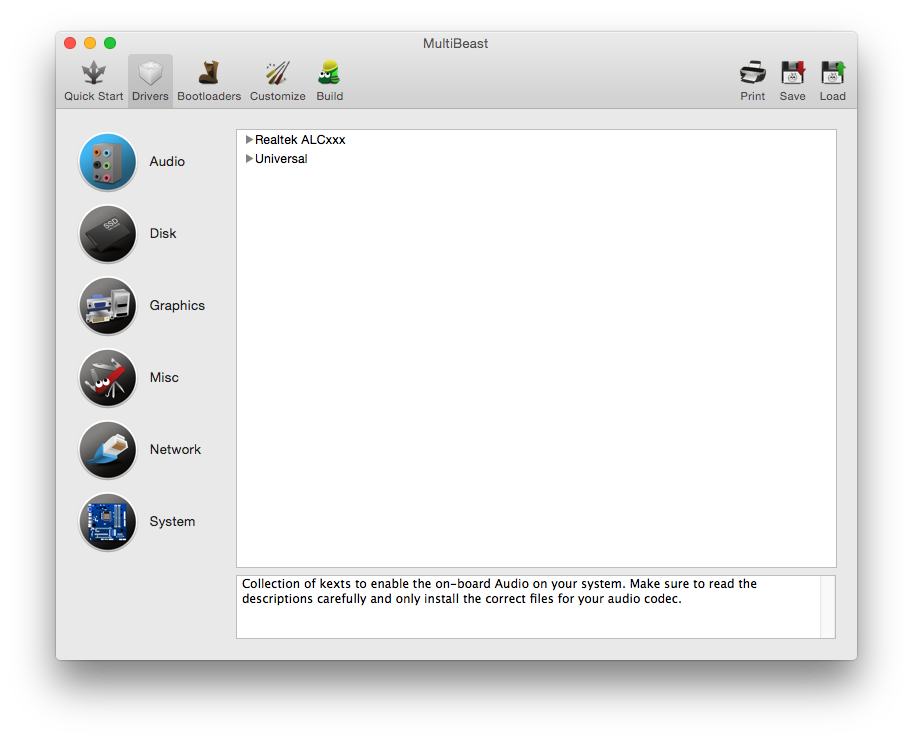
    10. Click Print or Save to back up your configuration
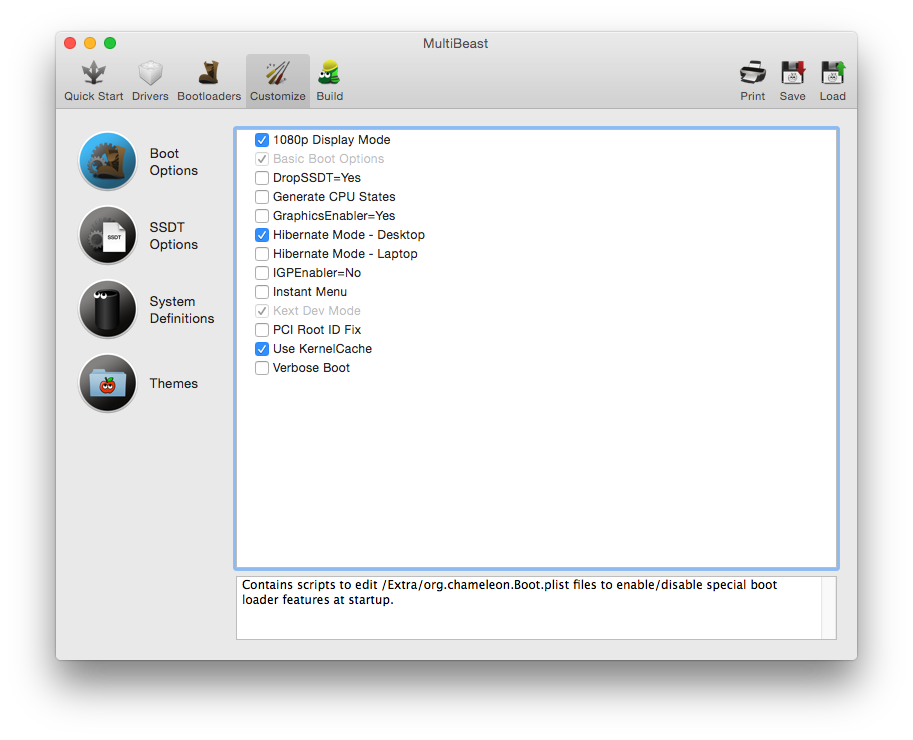
    11. Click Build then Install 

    12. Restart computer to complete installation

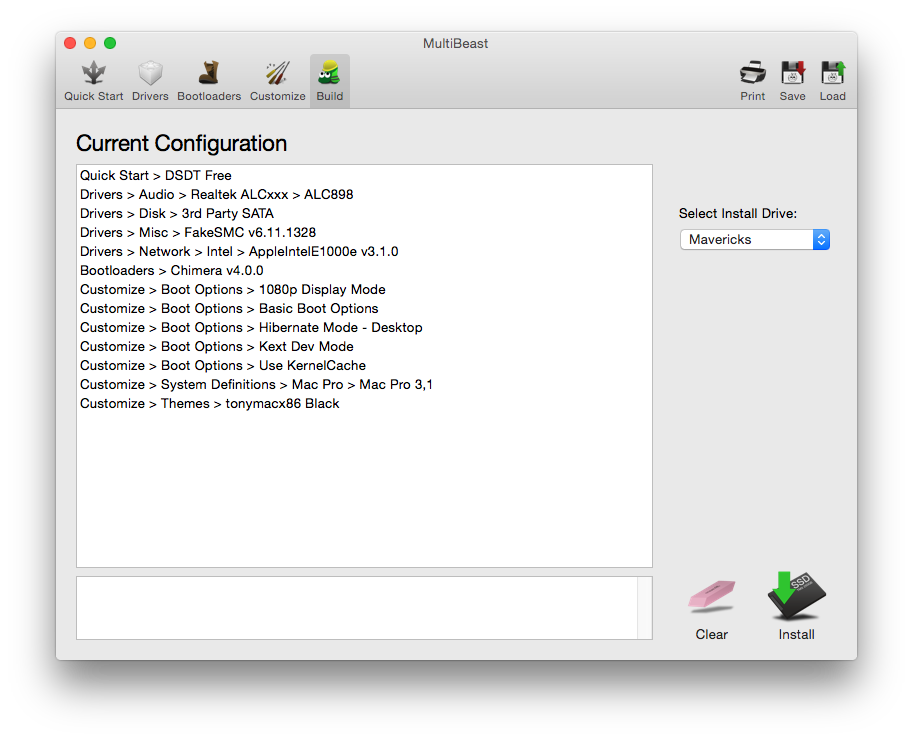
    Yay! You now have a fully updated bootable version of OS X Yosemite on your CustoMac! And a super handy USB rescue drive. It's easy to get frustrated, but don't give up! If you get stuck, there are many users with similar hardware in the tonymacx86 Forum to provide support. Special thanks to everyone in the community, and our moderators for testing!


    Alternate NVIDIA Graphics Drivers NVIDIA releases alternate graphics drivers separately on the web for each OS X build. These are different from the drivers Apple ships as standard, and should be considered experimental. In the past, the drivers have been known to solve OpenCL issues with certain applications, as well as providing better native GPU power management for certain devices. They also will enable the latest 'Maxwell' cards to work with full acceleration- NVIDIA GeForce GTX 750, GTX 750 Ti, GTX 970, and GTX 980.

    NVIDIA Releases Alternate Graphics Drivers for 10.10.4 (346.01.03)

    Related Posts:How To Install OS X Yosemite Using Clover
    UniBeast: Install OS X Mavericks on Any Supported Intel-based PC
    UniBeast: Install OS X Mountain Lion on Any Supported Intel-based PC
    UniBeast: Install Mac OS X Lion Using an All-In-One Bootable USB Drive
    iBoot + MultiBeast: Install Mac OS X on any Intel-based PC

Comments

Popular posts from this blog

sxhkd volume andbrightness config for dwm on void

xbps-install  sxhkd ------------ mkdir .config/sxhkd cd .config/sxhkd nano/vim sxhkdrc -------------------------------- XF86AudioRaiseVolume         amixer -c 1 -- sset Master 2db+ XF86AudioLowerVolume         amixer -c 1 -- sset Master 2db- XF86AudioMute         amixer -c 1 -- sset Master toggle alt + shift + Escape         pkill -USR1 -x sxhkd XF86MonBrightnessUp          xbacklight -inc 20 XF86MonBrightnessDown          xbacklight -dec 20 ------------------------------------------------------------- amixer -c card_no -- sset Interface volume run alsamixer to find card no and interface names xbps-install -S git git clone https://git.suckless.org/dwm xbps-install -S base-devel libX11-devel libXft-devel libXinerama-devel  vim config.mk # FREETYPEINC = ${X11INC}/freetype2 #comment for non-bsd make clean install   cp config.def.h config.h vim config.h xbps-install -S font-symbola #for emoji on statusbar support     void audio config xbps-i

Hidden Wiki

Welcome to The Hidden Wiki New hidden wiki url 2015 http://zqktlwi4fecvo6ri.onion Add it to bookmarks and spread it!!! Editor's picks Bored? Pick a random page from the article index and replace one of these slots with it. The Matrix - Very nice to read. How to Exit the Matrix - Learn how to Protect yourself and your rights, online and off. Verifying PGP signatures - A short and simple how-to guide. In Praise Of Hawala - Anonymous informal value transfer system. Volunteer Here are five different things that you can help us out with. Plunder other hidden service lists for links and place them here! File the SnapBBSIndex links wherever they go. Set external links to HTTPS where available, good certificate, and same content. Care to start recording onionland's history? Check out Onionland's Museum Perform Dead Services Duties. Introduction Points Ahmia.fi - Clearnet search engine for Tor Hidden Services (allows you

download office 2021 and activate

get office from here  https://tb.rg-adguard.net/public.php open powershell as admin (win+x and a ) type cmd  goto insall dir 1.         cd /d %ProgramFiles(x86)%\Microsoft Office\Office16 2.           cd /d %ProgramFiles%\Microsoft Office\Office16 try 1 or 2 depending on installation  install volume license  for /f %x in ('dir /b ..\root\Licenses16\ProPlus2021VL_KMS*.xrm-ms') do cscript ospp.vbs /inslic:"..\root\Licenses16\%x" activate using kms cscript ospp.vbs /setprt:1688 cscript ospp.vbs /unpkey:6F7TH >nul cscript ospp.vbs /inpkey:FXYTK-NJJ8C-GB6DW-3DYQT-6F7TH cscript ospp.vbs /sethst:s8.uk.to cscript ospp.vbs /act Automatic script (windefender may block it) ------------------------------------------------------------------------------------------------------------------- @echo off title Activate Microsoft Office 2021 (ALL versions) for FREE - MSGuides.com&cls&echo =====================================================================================&